How to Create JSM Portal Templates: Admin Setup Guide
Admin walkthrough for creating, styling, and publishing customer portal templates in Jira Service Management, from first template to going live.
Please note that all instructions below must be followed by an administrator and that your template may have many settings, such as Service Desks, Pages, Modules, Template type which determine in which project the template will be displayed, on which page, in which parts of the page, and more.
-
Install the plugin Install the plugin
-
Go to your applications page
-
Go to the plugin settings page
-
Click on the ‘Create a template’ button
-
Add a title to your template and go to the ‘content’ tab
-
Add content to your template and click on the ‘Render markdown’ button to see what will be displayed on your portal page
Please note that your template may have many settings, such as Service Desks, Pages, Modules, Template type, Styles which determine in which project the template will be displayed, on which page, in which parts of the page, and more. Read more about this at the links above.
-
Add content to your template and click on the ‘Render markdown’ button to see what will be displayed on your portal page
-
Click on the ‘Save’ button
-
Click on the ‘Apply’ button to have your template visible to customers on your support portal
-
In the dialog box that opens, click on the ‘save’ button
-
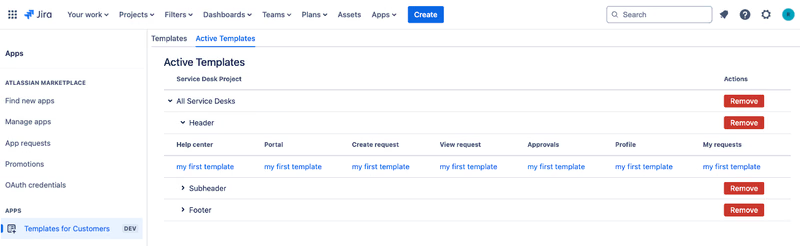
Go to the ‘Active Templates’ tab and manage all your templates in one place!
-
Go to your support page to see that the template you added is visible to all users!