Documentation – Task Deadline Tracker & Due Date Manager for Jira
Learn how to install, configure, and use Task Deadline Tracker & Due Date Manager for Jira to manage and update due dates with ease.
How to Use Task Deadline Tracker & Due Date Manager for Jira
Follow this step-by-step guide to start managing due dates efficiently with Task Deadline Tracker & Due Date Manager for Jira.
1. Install the Plugin
- Install Task Deadline Tracker & Due Date Manager for Jira from the Atlassian Marketplace.
- Once installed, the drag-and-drop deadline columns are available in your Jira projects.
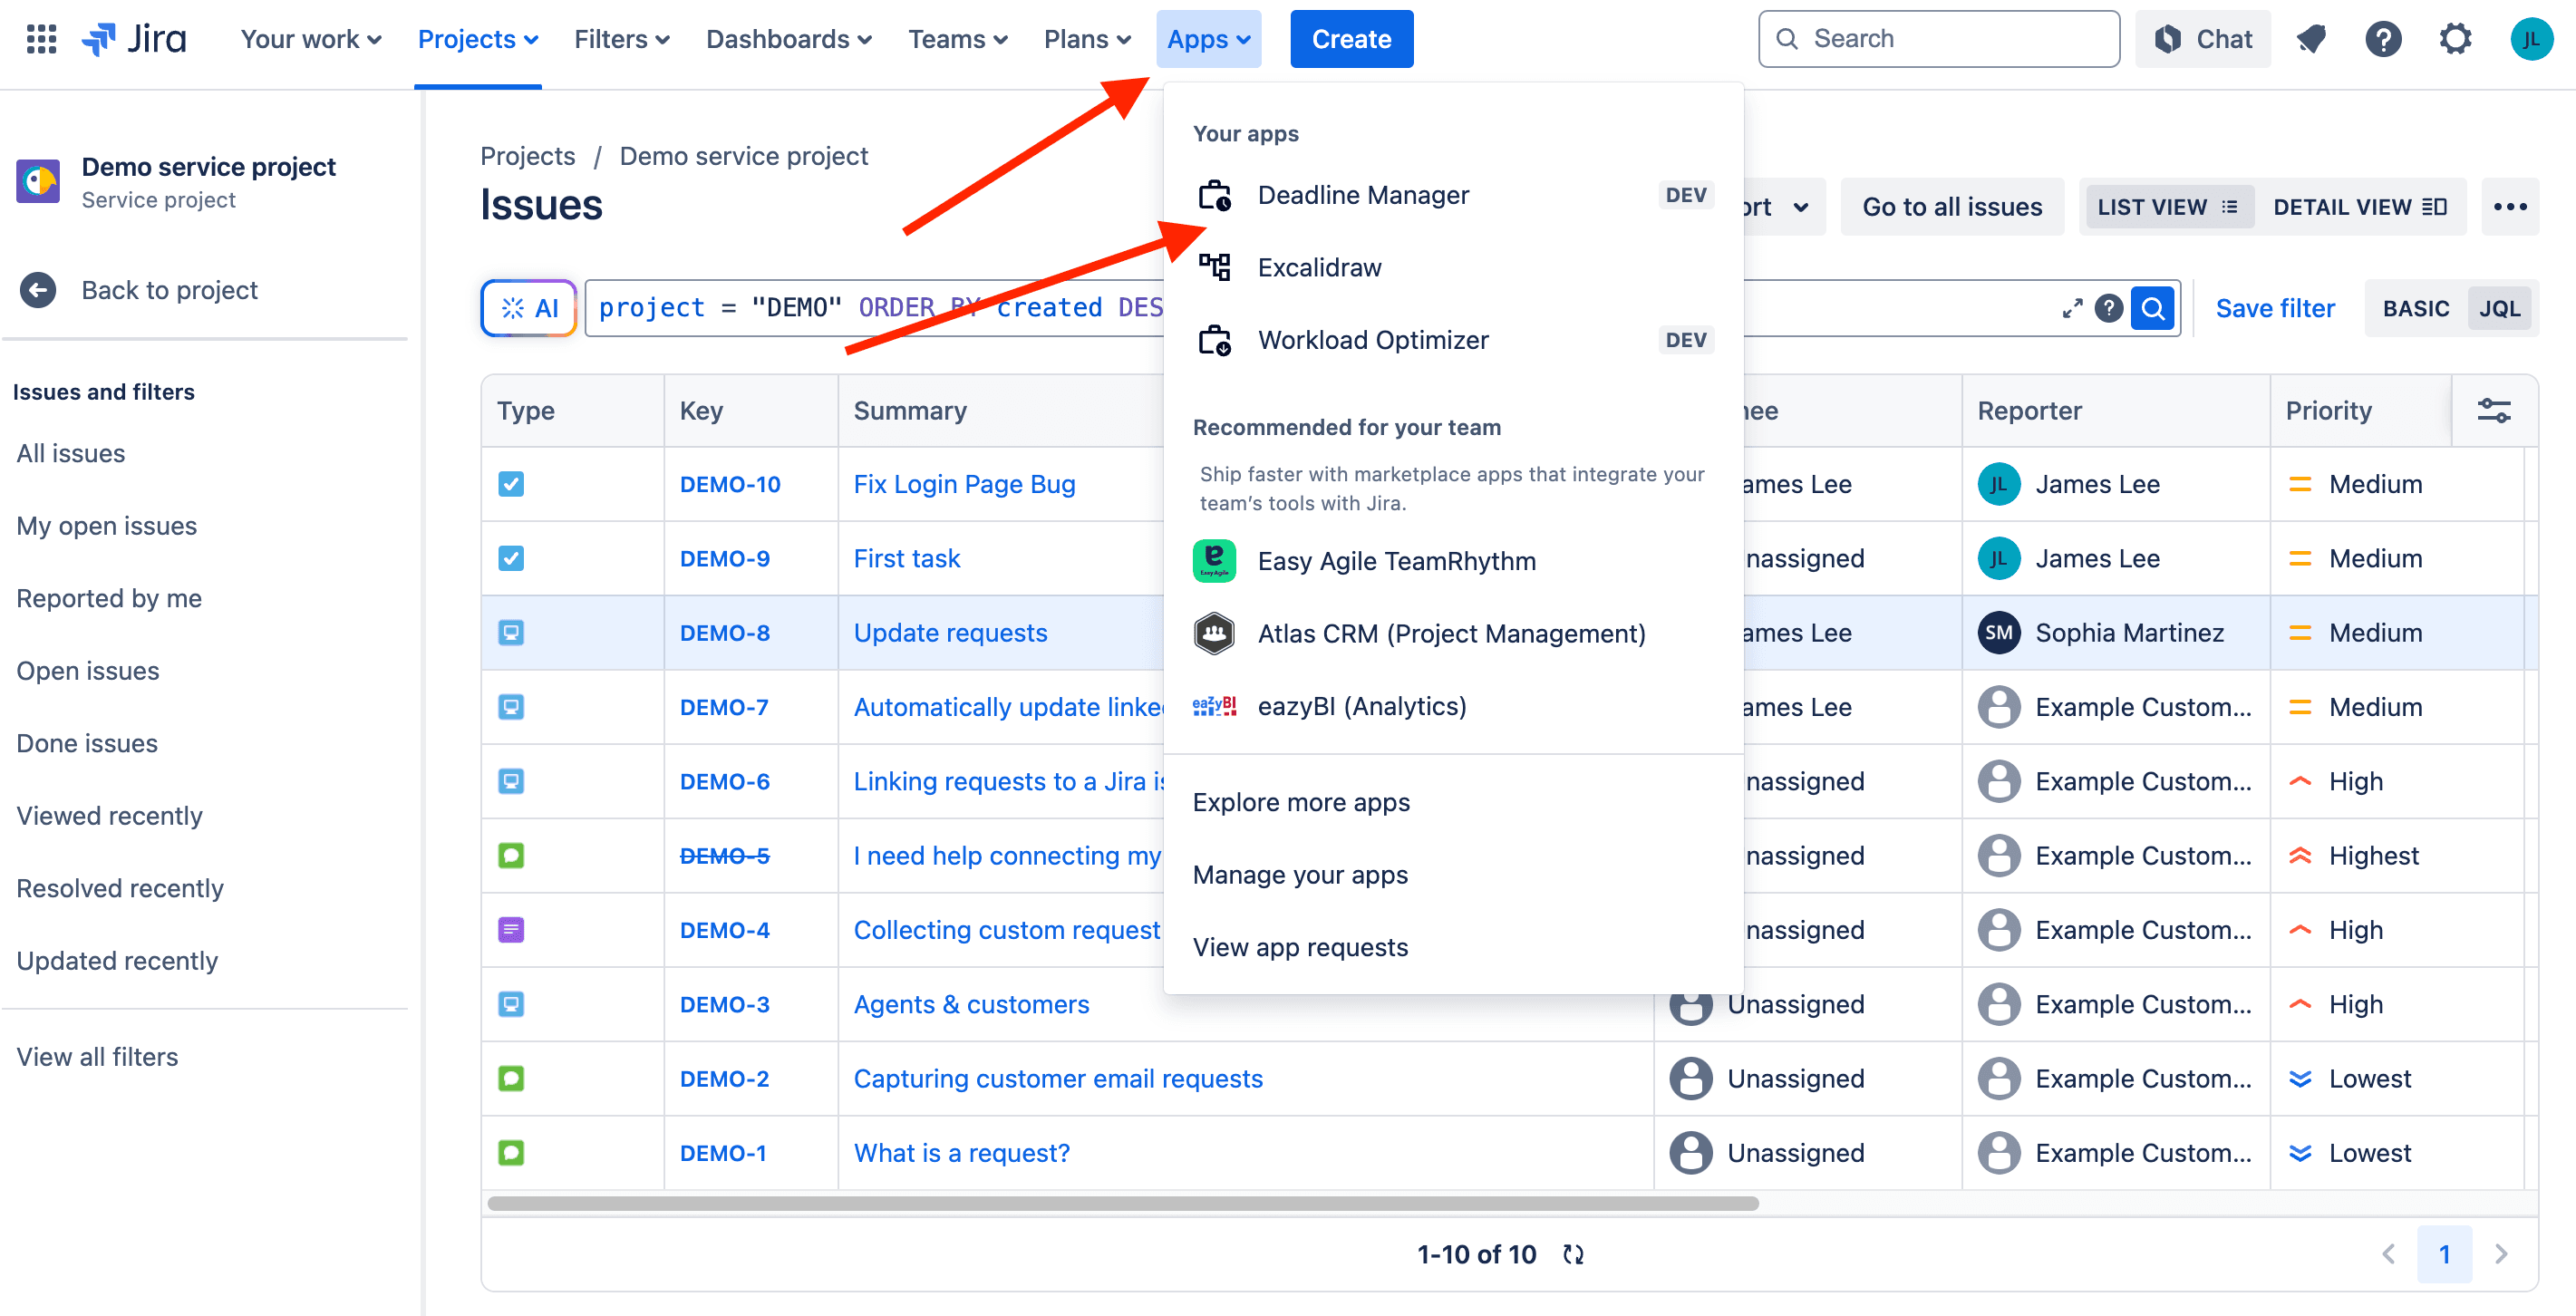
- In the dropdown menu "Apps," click on the "Deadline Tracker" tab.
2. View Comfortable Deadline Columns
- View your tasks organized into predefined deadline columns such as "1 Day", "3 Days", "1 Week," and more. This allows you to quickly see which tasks are approaching deadlines and which have more time.
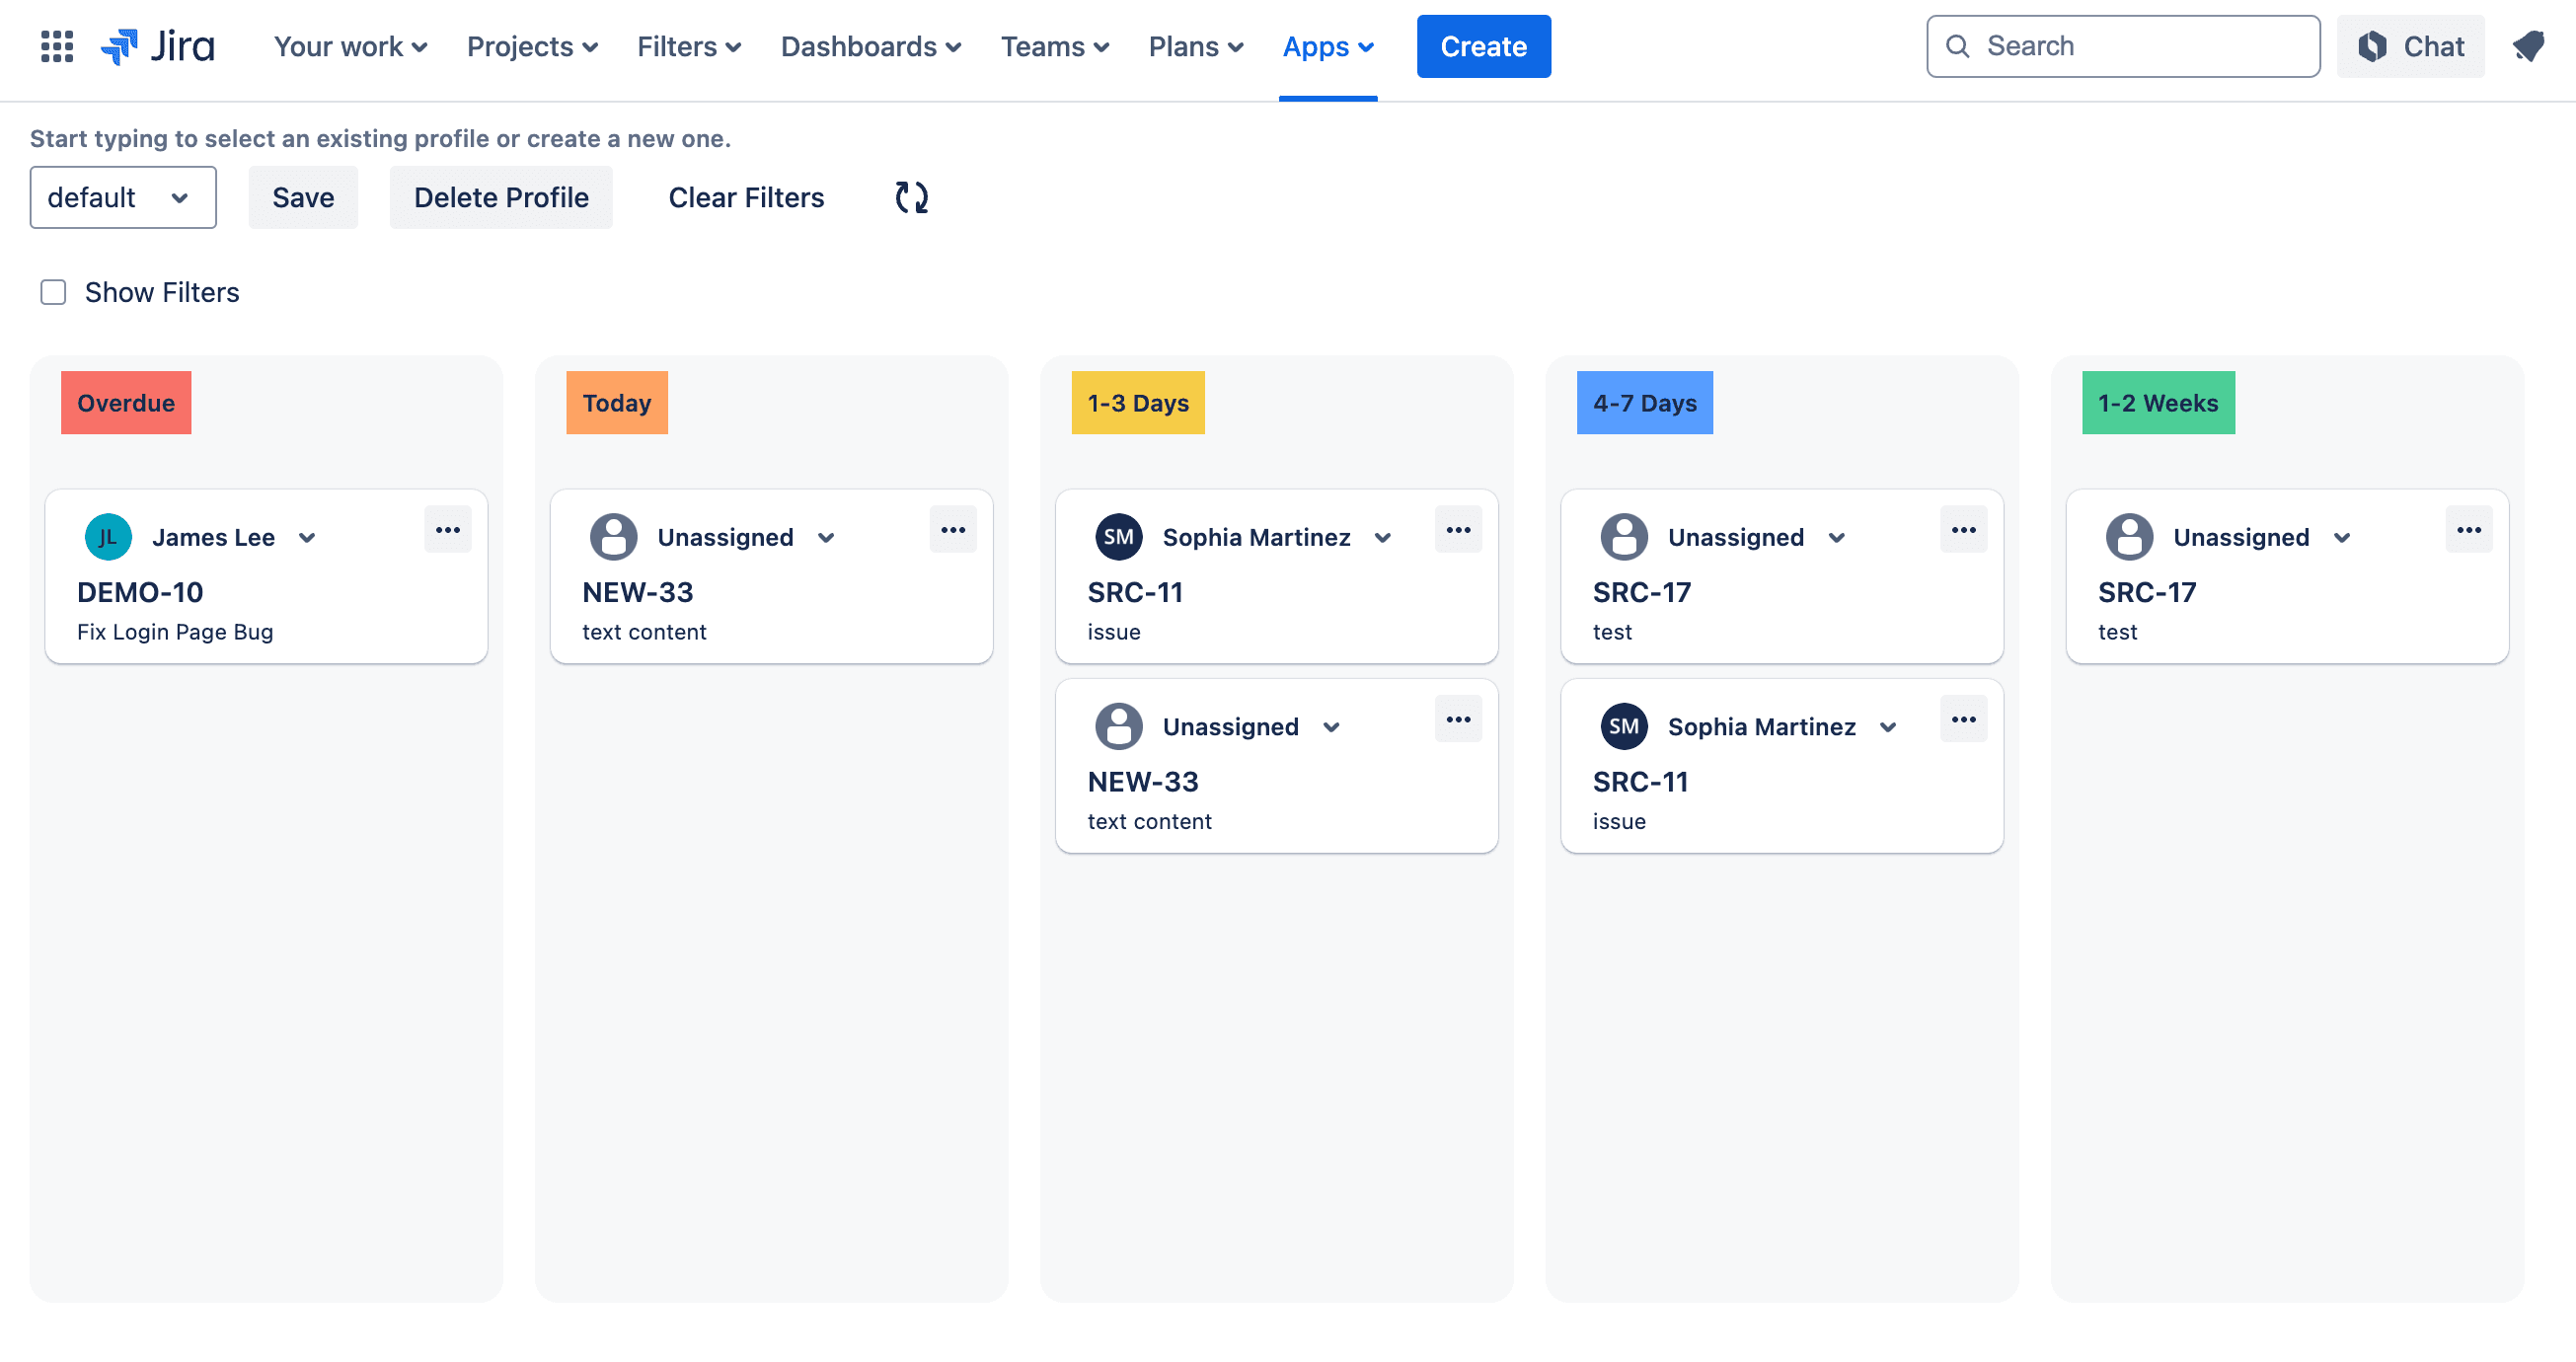
3. Drag and Drop Issues to Update Deadlines
- Easily update the due date of any issue by dragging it into the appropriate deadline column. This automatically adjusts the due date based on the column's time frame.

4. Apply Filters
- Filter tasks by project, priority, or issue type to focus on the deadlines that matter most.

Get Started with Task Deadline Tracker & Due Date Manager for Jira
Ensure your team never misses a deadline. Start organizing tasks by due date with Task Deadline Tracker & Due Date Manager for Jira and keep your projects on track.